Hey there! As a supplier of wall-mounted distribution boxes, I’ve got heaps of knowledge about setting these bad boys up on the wall securely. Whether you’re a DIY enthusiast or a professional electrician, getting your distribution box safely fixed is super important. Let’s dig into how you can do that. Wall Mounted Distribution Box
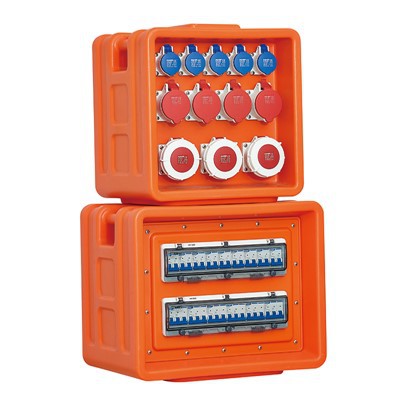
1. Preparation is Key
Before you even think about putting the box on the wall, you need to get your act together. First off, grab your wall-mounted distribution box and have a good look at it. Check for any signs of damage during shipping. You don’t want to mount a box that’s got a crack or something, as it could cause all sorts of problems down the line.
Next, gather your tools. You’ll need a drill, appropriate drill bits, screws, a level, a pencil, and a stud finder. Yeah, a stud finder might seem like overkill, but trust me, it’ll save you a whole lot of hassle. Mounting your box into a wall stud gives it the best support and stability.
Now, figure out where you want to mount the box. You need to think about things like accessibility, safety, and the layout of your electrical wiring. It should be in a place where it’s easy to reach for future maintenance but also out of the way of any potential damage. And make sure it’s not too close to water sources or areas with high traffic.
2. Finding the Right Spot
Once you’ve got your tools ready, it’s time to find the perfect mounting spot. Use the stud finder to locate the wall studs. You can usually tell where they are by the beeping or the indicator light on the stud finder. Mark the center of each stud with a pencil. It’s a good idea to mount the distribution box on at least two studs for better support.
If you’re not mounting it on a stud wall, like in a concrete or brick wall, you’ll need to use wall plugs. But that’s a bit more tricky, and you have to make sure you’re using the right type of plugs for your wall material.
Use the level to make sure the marked area is completely straight. You don’t want a crooked distribution box – it’ll look shoddy and could even affect the proper functioning of the electrical components inside.
3. Drilling Time
After you’ve marked the spots on the wall, it’s drill time. Put the right drill bit in your drill. For stud walls, a regular wood drill bit should do the trick. If it’s a concrete or brick wall, you’ll need a masonry drill bit.
Start drilling slowly at first to make sure you’re going in the right direction. Don’t rush it – you don’t want to crack the wall or drill at an angle. Make the holes deep enough for the screws, usually about an inch or so.
While you’re drilling, be careful not to hit any hidden wires or pipes in the wall. If you’re not sure about what’s behind the wall, it might be a good idea to call in a professional.
4. Mounting the Box
Once you’ve drilled the holes, it’s time to mount the box. Get your box and hold it up against the wall in the marked position. Make sure it’s level again. Then, insert the screws through the mounting holes on the box and into the holes you drilled in the wall.
Don’t tighten the screws all the way at first. Just get them started so you can make some final adjustments to the position of the box. Once you’re happy with how it looks and it’s perfectly level, tighten the screws properly.
5. Securing the Box
After getting the box up on the wall, you want to double-check that it’s secure. Give it a little shake (gently, of course) to see if it moves at all. If it does, you might need to tighten the screws some more or check if the holes are deep enough.
Also, make sure the box is flush against the wall. There shouldn’t be any gaps between the box and the wall, as this could let in dust, dirt, or even pests. If there are small gaps, you can use some caulk to seal them up.
6. Wiring and Final Checks
Once the box is securely mounted, you can start wiring it up. But that’s a whole different ballgame, and you need to follow all the electrical codes and safety procedures. Make sure you turn off the power before you start working on the wiring.
After you’re done with the wiring, do a final check. Make sure all the connections are tight, there are no loose wires, and everything is working as it should.
Why Choose Our Wall-Mounted Distribution Boxes
Now, I know there are a bunch of suppliers out there, but let me tell you why our wall-mounted distribution boxes are the best. We use high-quality materials that are built to last. Our boxes are designed to be easy to install and maintain. Plus, we offer a wide range of sizes and styles to fit your specific needs.

Whether you’re doing a small residential project or a big commercial one, we’ve got the perfect distribution box for you. And if you ever have any questions or need some advice, our team of experts is always here to help.
Let’s Connect
800A Distribution Box If you’re interested in our wall-mounted distribution boxes or want to know more about how to install them, don’t hesitate to reach out. We’re more than happy to have a chat and help you secure the right product for your project. We can provide you with detailed product specifications, pricing, and any other info you might need. So, why wait? Start planning your next electrical project with our top-notch distribution boxes.
References
- Electrical Installation Handbook by Schneider Electric
- National Electrical Code (NEC) standards
Apeks Electric Co., Ltd.
As one of the leading wall mounted distribution box manufacturers and suppliers in China, we also support custom service. With abundant experience, we warmly welcome you to wholesale high quality wall mounted distribution box from our factory. Welcome to view our website for more information.
Address: No.2 Yuyao Rd, Yuxin, Nanhu District, Jiaxing, China
E-mail: kevin@apekselectric.com
WebSite: https://www.powerdistros.com/
